
Email broadcast
Email marketing is when you send a commercial email message to your ‘email subscribers’ — contacts who have signed up to your email list and given express permission to receive email communications from you.
Email marketing is used to inform, drive sales, and build a community around your brand (e.g. with a newsletter).
Modern email marketing has moved away from one-size-fits-all mass mailings and instead focuses on consent, segmentation, and personalization.
Understanding the importance of email marketing, Realcore provides Email service that can send emails to a single or an entire list of people at the same time, summarizes the status of all sent emails for users.
Setup email sender
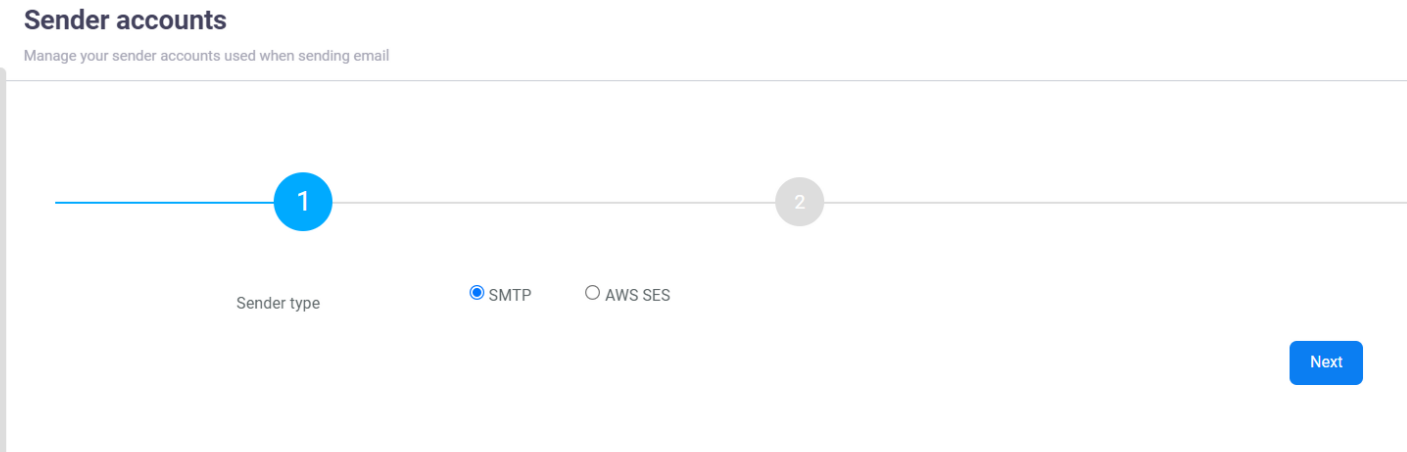
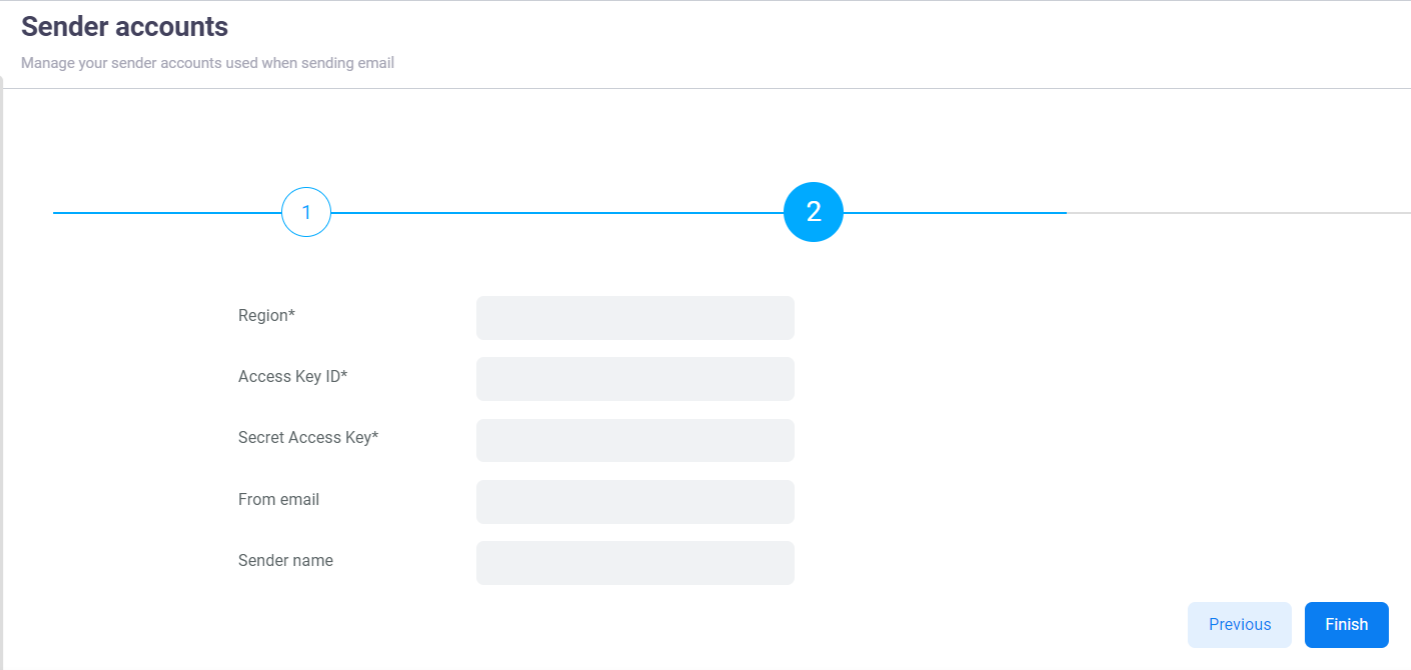
Firstly, go to Setting > Email senderto set up your sender accounts that will be used to send emails by clicking the button “Add Sender Account”, you will need to select sender type first, we are supporting SMTP and AWS SES. Below is a sample screenshot after selecting AWS SES as Sender type.
Once your sender account is created successfully, it will be displayed on the list of sender accounts screen. You can create multiple sender accounts and select the default sender account by checking on the checkbox as below.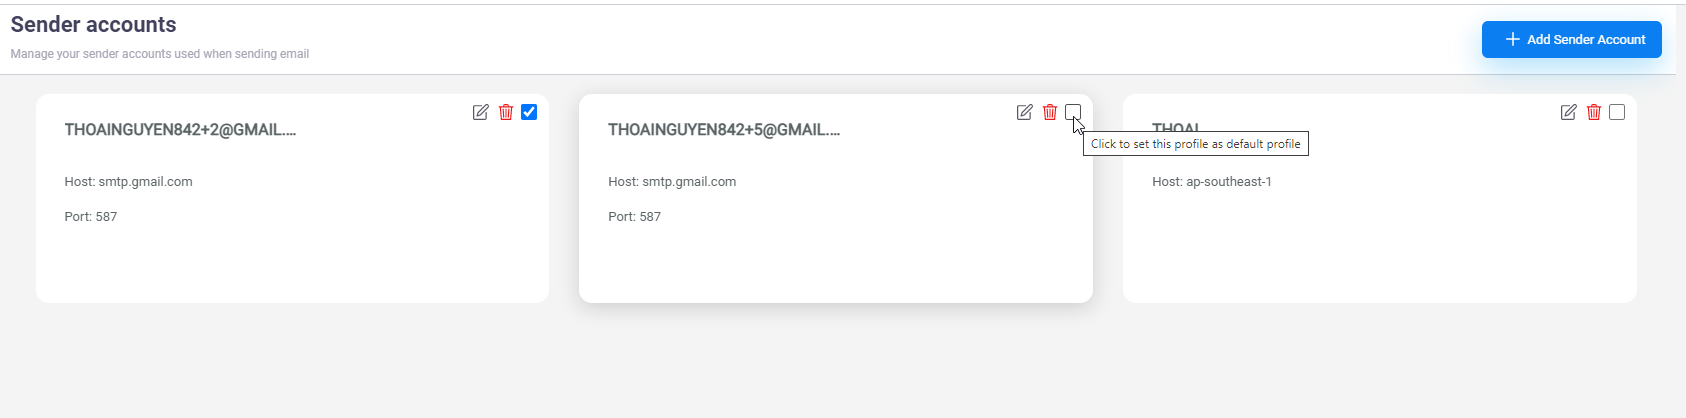
Additionally, Realcore enables you to configure round-robin groups that contain multiple sender accounts and can be used to send email broadcasts with a round-robin strategy. You can access to Setting > Rdoun-robin groups to create round-robin groups.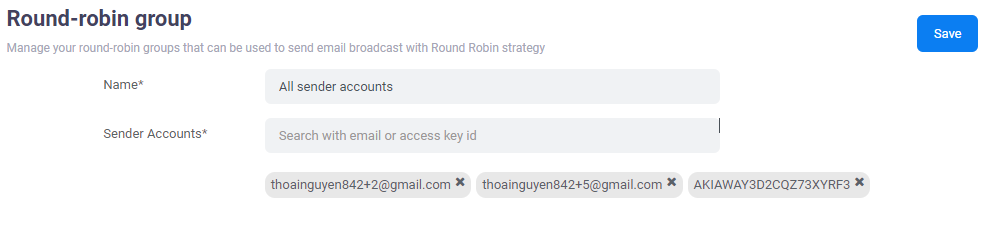
Create email
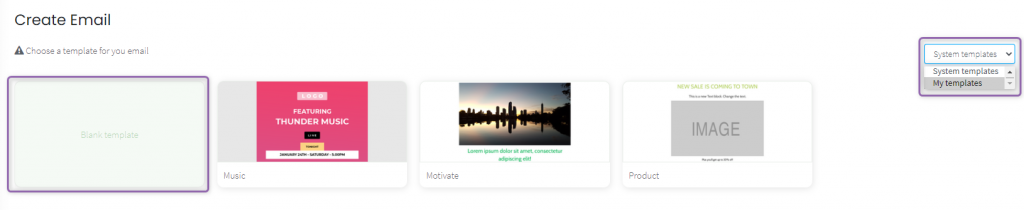
Go to Activation > Email broadcast > Create email to create and send your own email.
Choose your template, System templates are provided by Realcore or My templates are your created and saved the previous email as a template, or you can write an email from the scratch by choosing Blank template.
Once a template is chosen, the email builder screen will appear:
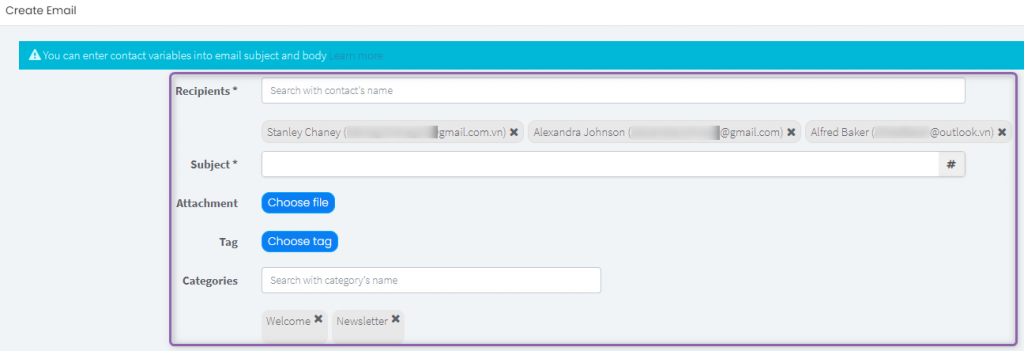
There are some fields that need to be focused on:
- Recipients: The contacts will receive your email, simply type a name or email to choose.
- Subject: Subject of the email.
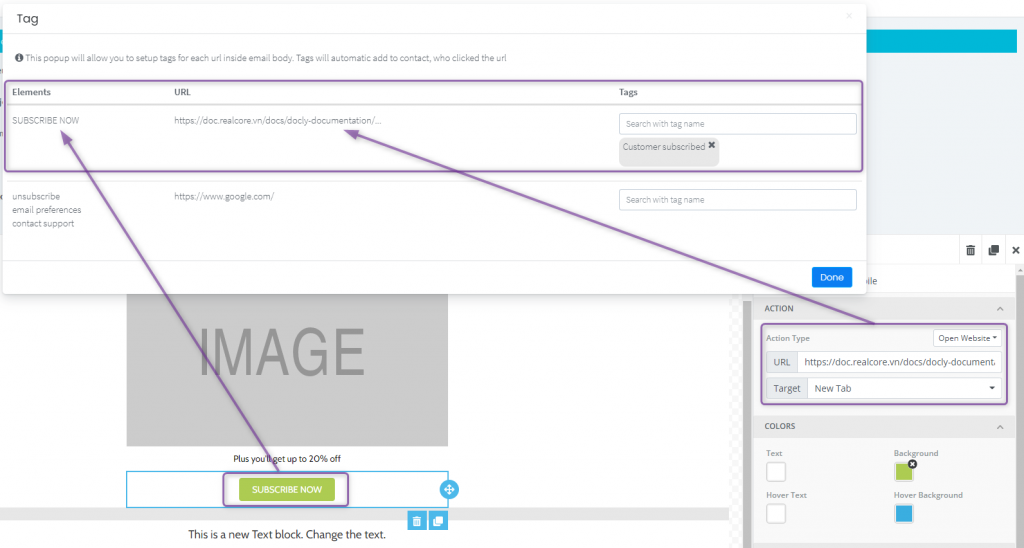
- Tag: You can assign an URL to an element in the email, and when the customer clicked it, the tag will be applied to the contacts automatically.
- Categories: Sent email comes with a category, which helps Realcore summarize the number of emails sent, and how efficiently your email work.
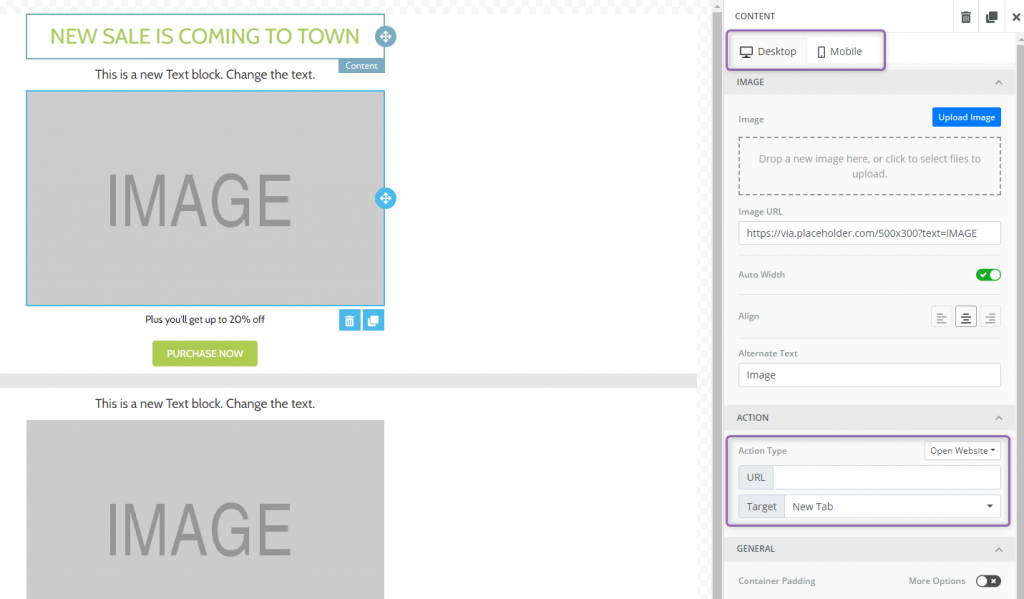
The main component of this screen is email builder.
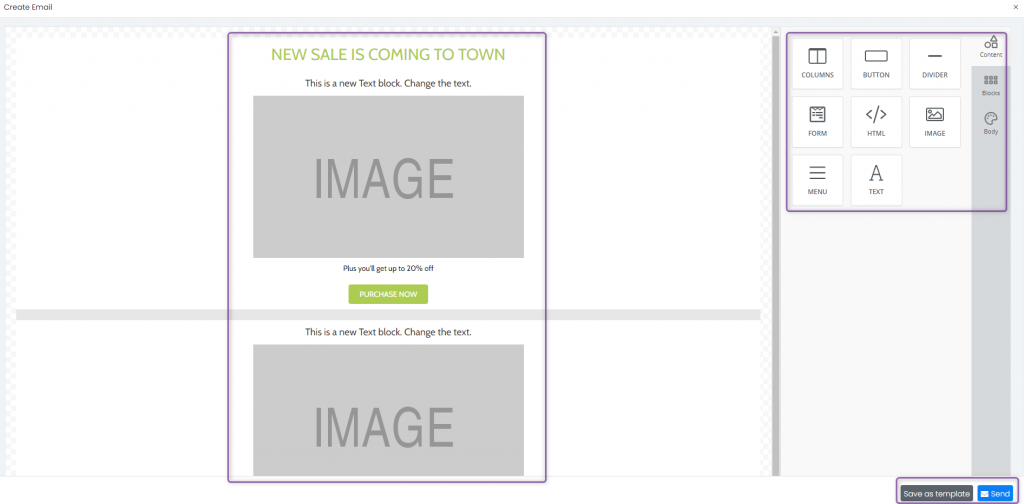
On the left side is all content that can be added to the email: Text, Button, Link, Image … By clicking on a component, you can edit its properties, preview it on both Desktop and Mobile view, adding URL …
Recipient activation
In order to add tag to a customer who clicked a specific link in your email, you can click the “Choose tag” button in the header, there is an option to allow you to assign one or more tags to contact who clicked the URL, automatically.
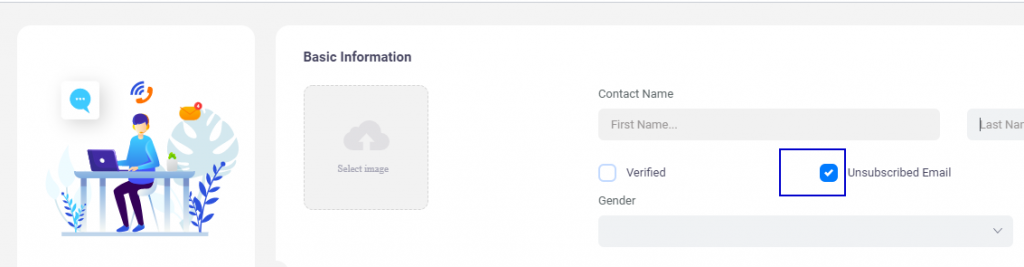
Realcore also helps you to personalize the email base on contact information. You can add a field of contact (include default field and custom field) into email as dynamic text, means it can be different between contact.
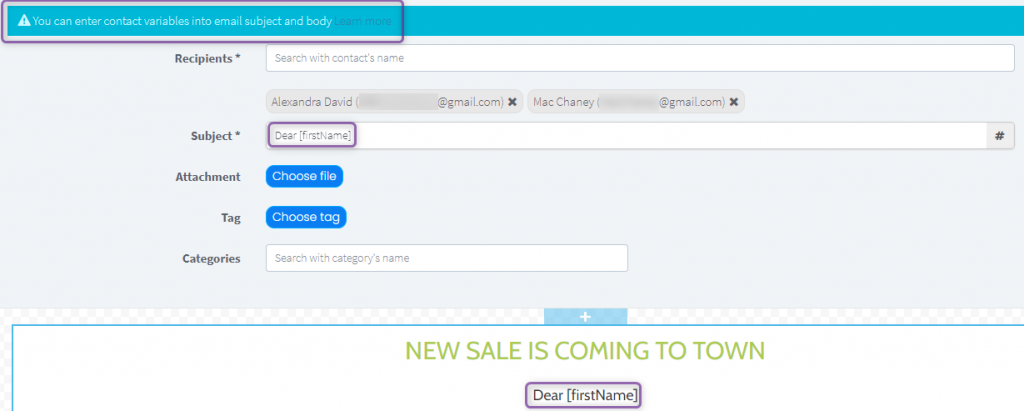
For example, this email will display “Dear Alexandra” when sending to Alex’s email, and “Dear Mac” with Mac’s email. With more than 30 fields of contact information, this option will make the email look like it is written especially for a contact.
You can also add unsubscribe link to anyplace inside your email content by creating a link with a special URL is [unsubscribeLink]
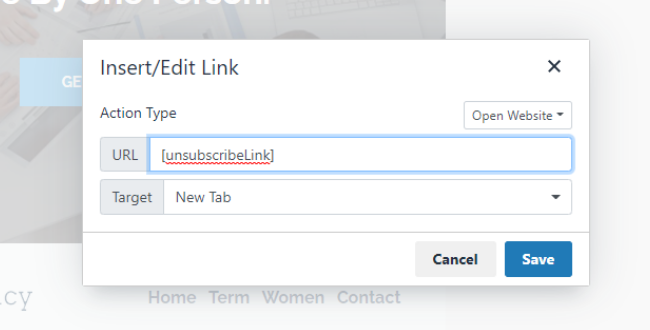
As soon as a recipient clicks on the unsubscribe link, Realcore will set unsubscribe field to True automatically.
Pro-tip: Next time when you send email to unsubcribed recipients, Realcore will display an alert message as below to let you know that you can avoid sending spam email. Note that when sending emails via Realcore's automation tool, Realcore will automatically exclude unsubcribed recipients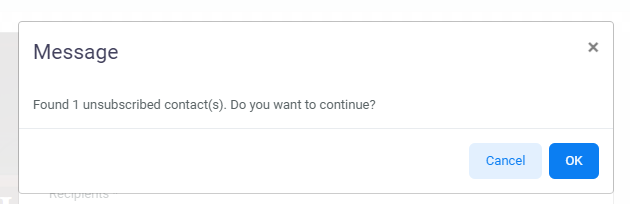
Broadcast your email
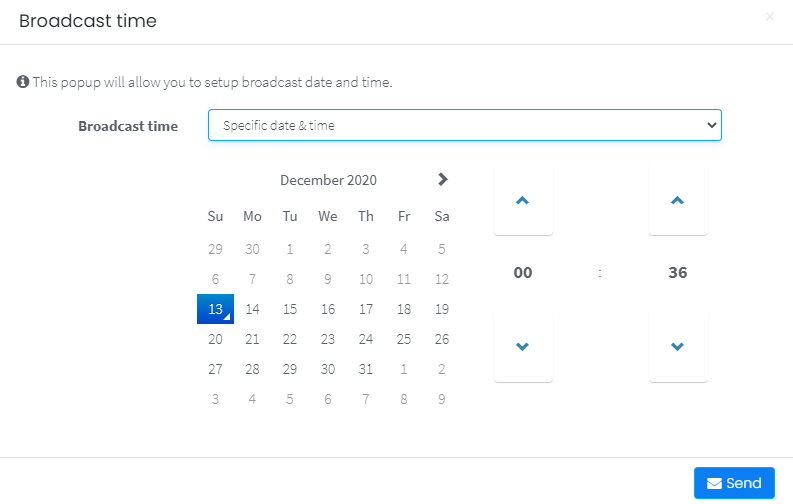
After finishing editing the email, on the left bottom, click “Save as template” if you want to save the email as a template to use later, or click “Send” to send the email. A pop up will appear to choose to send immediately or send with at a specific time:
Pro-tip: Send email to a list of contacts by combining Tag, Contact list and Email broadcast
As mentioned, you can assign a tag to contact who clicked the link in email automatically. With these contacts, use the search box for tag in Contact list screen, tick all the contacts and click "Send email" button, the remaining steps are just like creating an email.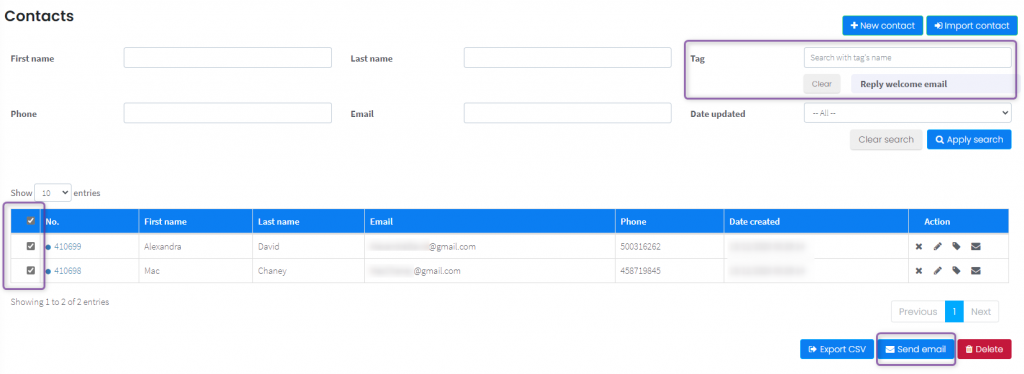
Track your sent emails with email outbox
After sending an email, a pop-up informs that the email is sent successfully will appear, ask you to view the email outbox detail, click OK and a screen of the email outbox will be shown.
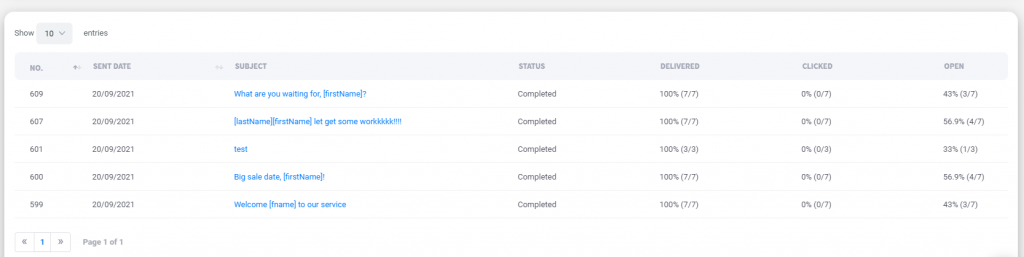
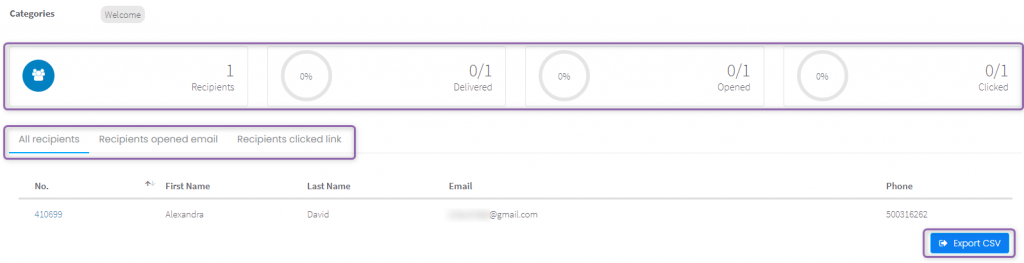
In this screen, it will be the status of the sent email, including the number of recipients, delivered, opened, clicked successfully. You can also view Contacts opened the mail, contacts clicked the link in the email, export these contacts to a .csv file for further purpose.
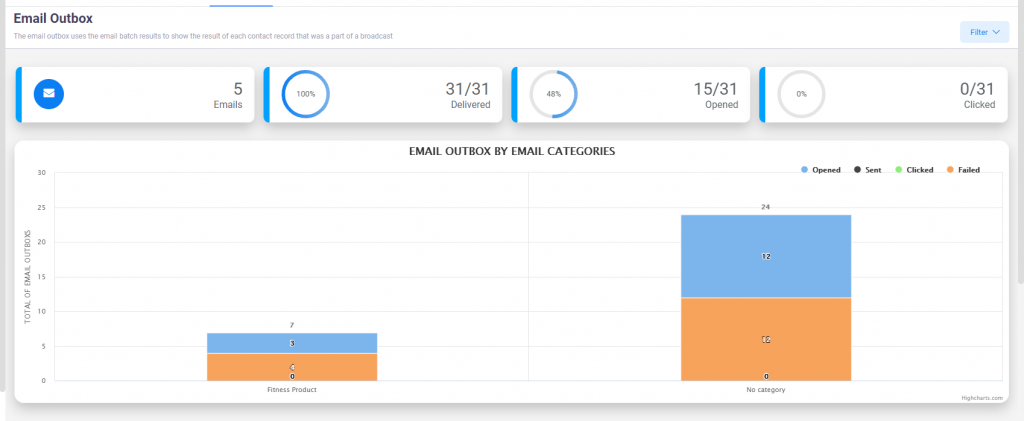
Go to Activation > Email broadcast > Email outbox will give you detailed reports of all emails sent that include some charts showing the number of emails sent with categories on a specific day, the status of each email sent, searching for previous emails sent, and so on.
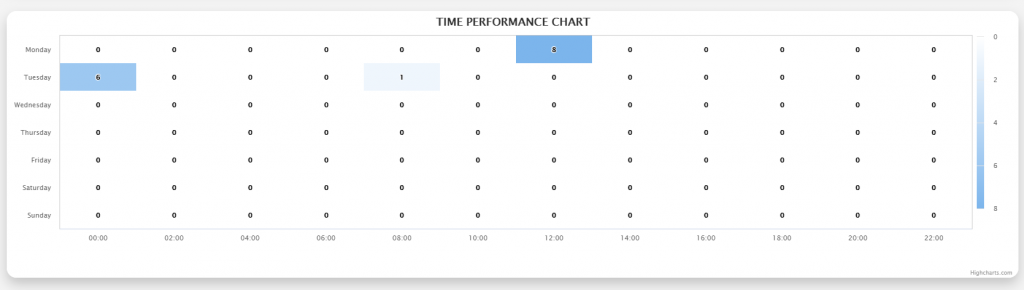
With the time performance chart that displays how frequently recipients opened your email at a specific hour on a specific day of the week, you can have an overall look at the email broadcast, how efficient the emails worked.
You can also see all sent emails with the summary situations and click on an subject to see detailed reports.